- New UI looks nice (but I prefer the old one)
- New style scrollbar makes me confuse a bit (but it's one of the good thing that I like)
- Apps menu appear on top panel instead of on its own window (except for Libre Office apps)
- Quick search for apps (very helpful if you know the name)
- Unable to customize panel
- Enabling desktop cube via ccsm will cause top panel and app launcher stop responding. Windows border disappear
- Overall, I don't like it. I'm glad that I switched to LM last year.
A blog by an ordinary Linux user who uses Windows in his day job.
Saturday, April 30, 2011
My 5 minutes on Ubuntu 11.04...
Wednesday, April 20, 2011
SARDU vs YUMI...
| SARDU | YUMI | |
| Multibootable USB | Yes | Yes |
| Multibootable CD/DVD | Yes | No |
| Support XP/7 installer | Yes | Yes, with some tweak. Please refer to Very Important note here. |
| Support Linux installers | Yes | Yes |
| Summary |
Pros:
Cons:
|
Pros:
Cons:
|
Update (25/05/2011)
There's a new multiboot iso creator tool call XBOOT. In terms of usability it is straight forward. Simply drag and drop the ISO's (love the drag and drop features). However the downside is that it require .NET framework 4 to works and didn't support Windows installer.
Conclusion:
For multiboot iso creator, if you're on Windows system and
- want to use the tool to create the usb/cd boot that support both Windows and Linux installer, go for SARDU
- want to use the tool to create the usb boot (and not even bother about cd boot), go for YUMI
- want to use the tool with nice GUI to create the usb/cd boot (and not even bother about Windows installer), go for XBOOT
Bottom line is, it's all about choices. Choose the best tool that will suit your need.
Wednesday, April 13, 2011
Creating Windows USB startup disk...
As written in my previous post, I would like to test a couple of USB startup disk creators for Windows (that can put our beloved Windows installer into USB device). So now, here's the result. I would say that SARDU (imho) is the best tool currently available. Bonus part, you don't even need to install. Simply extract the zip file and voila! you ready to go. Here's the step by step on how to:
1) Download the zip file from here.
2) Extract it into your D:\ drive.
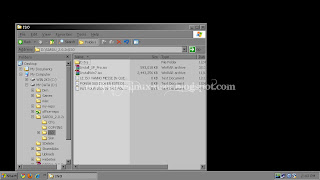
3) Go to extracted folder and copy your windows installer (in .iso format) into ISO subfolder.
4) Rename the iso file based on OS like listed below:
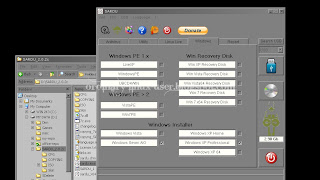
5) Execute sardu.exe, notice that your Windows installer has been detected by SARDU.
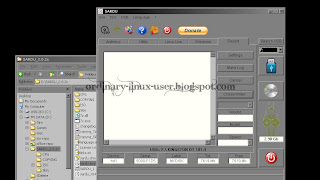
6) Plug in your USB thumb/pen/whatever you may call it drive and click "Search USB" button. Make sure it's using FAT32 file system (otherwise you may need to re-format it).
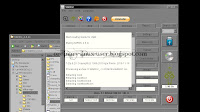
7) Once your USB pendrive detected, click button with pendrive icon to start the process.
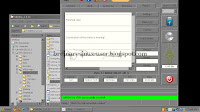
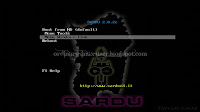
8) Once completed, close SARDU and unplug your USB pendrive. Plug it into any machine that support boot up via USB, restart and press boot menu key (F12 for Dell). Select USB device and you're in.
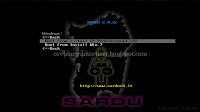
Note: Tested with Windows XP Pro and Windows 7 Ultimate 32-bit installer.
If you just need Windows XP installer, 1 GB pendrive should be sufficient enough.
For Linux users, MultiSystem does support Windows 7 and XP installer via syslinux and grub4dos option respectively. However from my test result, it only works for Windows 7. No luck for XP.
Update (14/04/2011)
I forgot to mention that if you want to install XP on SATA hard disk, you need to slipstream the driver into the installer. This can be done via nLite. Reference to SATA drivers for XP. However, I'm still unable to make my slipstreamed installer works.
Update (15/04/2011)
It's difficult to test the slipstreamed installer on VirtualBox. Solved the first BSOD by changing disk type from IDE to SATA. Second BSOD (happened at second stage) might be due to the different type of SATA driver required by VirtualBox. Wish I could get a real machine soon.
Update 2 (15/04/2011)
Slipstreamed installer works!!! Tested on real SATA hard disk. Perfect solution for netbook (USB pendrive + XP installer + SATA drivers).
1) Download the zip file from here.
2) Extract it into your D:\ drive.
3) Go to extracted folder and copy your windows installer (in .iso format) into ISO subfolder.
4) Rename the iso file based on OS like listed below:
- Windows Vista - InstallVista.iso
- Windows 7 - InstallWin7.iso
- Windows XP Home - Install_XP_Home.iso
- Windows XP Pro - Install_XP_pro.iso
- Windows XP 64 - Install_XP_x64.iso

ISO folder
5) Execute sardu.exe, notice that your Windows installer has been detected by SARDU.

Windows installers detected
6) Plug in your USB thumb/pen/whatever you may call it drive and click "Search USB" button. Make sure it's using FAT32 file system (otherwise you may need to re-format it).

USB device detected
7) Once your USB pendrive detected, click button with pendrive icon to start the process.


Processing...
8) Once completed, close SARDU and unplug your USB pendrive. Plug it into any machine that support boot up via USB, restart and press boot menu key (F12 for Dell). Select USB device and you're in.


SARDU boot menu
Note: Tested with Windows XP Pro and Windows 7 Ultimate 32-bit installer.
If you just need Windows XP installer, 1 GB pendrive should be sufficient enough.
For Linux users, MultiSystem does support Windows 7 and XP installer via syslinux and grub4dos option respectively. However from my test result, it only works for Windows 7. No luck for XP.
Update (14/04/2011)
I forgot to mention that if you want to install XP on SATA hard disk, you need to slipstream the driver into the installer. This can be done via nLite. Reference to SATA drivers for XP. However, I'm still unable to make my slipstreamed installer works.
Update (15/04/2011)
It's difficult to test the slipstreamed installer on VirtualBox. Solved the first BSOD by changing disk type from IDE to SATA. Second BSOD (happened at second stage) might be due to the different type of SATA driver required by VirtualBox. Wish I could get a real machine soon.
Update 2 (15/04/2011)
Slipstreamed installer works!!! Tested on real SATA hard disk. Perfect solution for netbook (USB pendrive + XP installer + SATA drivers).
Tuesday, April 12, 2011
Converting XP into kiosk...
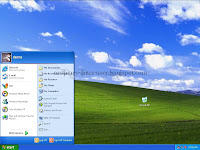
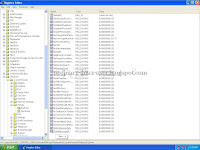
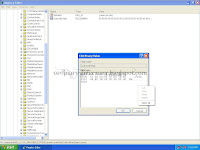
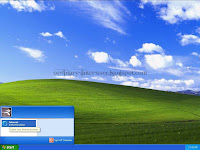
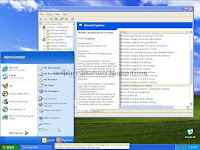
Screenshots...
Last week I've been assigned with mini project on how to setup a kiosk machine (well, sort of). Instead of spending money for the right tool (which could save time), the manager kept pushing for the free alternative route. The worst part is, company web portal can only be access via IE7+ (common case for local company) which means no Linux on the list.
The only option that I have in hand was to use Windows XP with IE8. To strip down the OS features it would be easy to use Group Policy (gpedit.msc) however the changes will affect all users. So whether I want it or not, I need to tweak the registry for kiosk user. I've set the machine with two users:
1) administrator - for pc maintenance
2) demo - kiosk user
For now, kiosk user is in admin group. Log into the machine as kiosk user and hide the icon from desktop via right click menu. Then open the registry (run -> regedit). Here's the steps:
1) Go to HKEY_CURRENT_USER\Software\Microsoft\Windows\CurrentVersion\Policies\Explorer\ and add DWORD values below (leave NoRun = 0 for now, change it to 1 once everything is done)
NoStartMenuMFUprogramsList = 1
NoStartMenuMorePrograms = 1
NoWindowsUpdate = 1
NoStartMenuMyMusic = 1
NoSMMyPictures = 1
NoFavoritesMenu = 1
NoRecentDocsMenu = 1
DisableMyPicturesDirChange = 1
DisableMyMusicDirChange = 1
DisableFavoritesDirChange = 1
NoSMMyDocs = 1
DisablePersonalDirChange = 1
ClearRecentDocsOnExit = 1
NoNetworkConnections = 1
NoStartMenuNetworkPlaces = 1
NoRecentDocsNetHood = 1
NoSMHelp = 1
NoFind = 1
NoResolveSearch = 1
NoResolveTrack = 1
StartMenuLogoff = 1
NoStartMenuEjectPC = 1
NoChangeStartMenu = 1
NoSetTaskbar = 1
NoInstrumentation = 1
NoUserNameInStartMenu = 1
NoToolbarsOnTaskbar = 1
NoViewContextMenu = 1
NoSMConfigurePrograms = 1
NoTrayItemsDisplay = 1
NoTrayContextMenu = 1
Nologoff = 1
NoSetFolders = 1
NoRun = 0
2) In the same location, change value for NoDriveTypeAutoRun to b1
3) Now add two keys (NonEnum and System) under HKEY_CURRENT_USER\Software\Microsoft\Windows\CurrentVersion\Policies\. I'll have a structure like below
HKEY_CURRENT_USER
        \Software
            \Microsoft
                \Windows
                    \CurrentVersion
                        \Policies
                            \Explorer
                            \NonEnum
                            \System
4) Remove "My Computer" from Startup Menu, go to HKEY_CURRENT_USER\Software\Microsoft\Windows\CurrentVersion\Policies\NonEnum\ and add DWORD value below (don't ask me why it's been named with guid)
{20D04FE0-3AEA-1069-A2D8-08002B30309D} = 1
5) Disable "Task Bar" and "Lock Workstation", go to HKEY_CURRENT_USER\Software\Microsoft\Windows\CurrentVersion\Policies\System and add DWORD values
DisableTaskMgr = 1
DisableLockWorkstation = 1
6) Disable BalloonTip, hide "Control Panel" and hide "Printers and Faxes", go to HKEY_CURRENT_USER\Software\Microsoft\Windows\CurrentVersion\Explorer\Advanced\ and add DWORD values
ShowInfoTip = 0
StartButtonBalloonTip = 0
Start_ShowControlPanel = 0
Start_ShowPrinters = 0
7) Disable "System Standby", go to HKEY_LOCAL_MACHINE\SYSTEM\CurrentControlSet\Services\ACPI\Parameters\ and add DWORD value
Attributes = 70
8) Disable "Window Key" and "F1", go to \HKEY_LOCAL_MACHINE\System\CurrentControlSet\Control\Keyboard Layout\ and add Binary value below
Scancode Map = 00,00,00,00,00,00,00,00,03,00,00,00,50,E0,5B,E0,48,E0,3B,00,00,00,00,00
Reboot the machine and test the changes. Once everything okay, re-open regedit and change the value for NoRun to 1
To strip features from IE (such as SaveAs, Print etc), log into the machine as admin and set it via Group Policy (gpedit.msc). Finally, remove kiosk user (demo) from Administrators and add it into Guests and Remote Desktop Users group. Now I have a so called kiosk machine.
Welcome to my outdated world!!!
Update (18/04/2011)
After putting so much efforts into making this a reality, I've stumbled upon this link on How to Put Windows XP in Kiosk Mode. Though I haven't try it yet, but the solution is damn simple. Argh!!!! I'm pulling off my hair now...
Sunday, April 10, 2011
Batch process images plugin for Gimp...
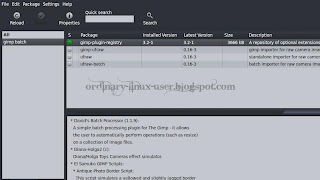
To install
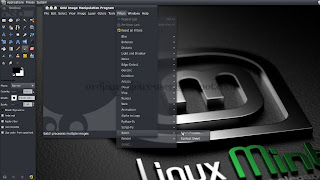
To use the plugin, open Gimp and go to Filters -> Batch -> Batch Process... menu
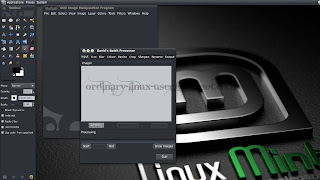
Add files to be process at Input tab
Set value to whichever tab processes that you need and set the image type at Output tab (default is .bmp).
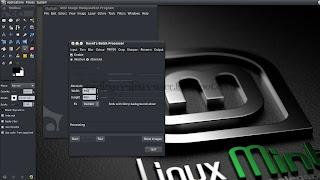
Click Start button.
Note:
Tested with GIMP v 2.6.10 on Linux Mint 64-bit.
sudo apt-get install gimp-plugin-registryIf you prefer GUI installer, open Synaptic, search for gimp batch and mark for installation

Synaptic
To use the plugin, open Gimp and go to Filters -> Batch -> Batch Process... menu

GIMP batch process plugin
Add files to be process at Input tab

Input tab
Set value to whichever tab processes that you need and set the image type at Output tab (default is .bmp).

Resize tab
Click Start button.
Note:
Tested with GIMP v 2.6.10 on Linux Mint 64-bit.
Subscribe to:
Comments (Atom)