Wednesday, September 30, 2009

Ubuntu + FVWM-Crystal = Low Memory PC...

An old post from my lost blog.

Installation modes


Why must it be Ubuntu?
Because it's much more easier for me to find my favorite .deb in repository and internet (deluge, exaile etc). This is a case for pc with Pentium III or higher but lower in ram size (128Mb to be precise, and most of my relatives are using this kind of pc).

Why Pentium III or higher?
It is noted in polishlinux.org regarding Ubuntu system responsiveness

"Technically, packages (except for the kernel and libc) are compiled for 486, but with Pentium III (or higher) optimizations."

So for pc with the lower specification as I mentioned above, Puppy Linux will do the job :)

Ok, first thing needs to be done is to download the alternate installer .iso image from here or the torrent file from here. Burn it to a disc and boot your pc with it. At installation menu, press F4 to change installation mode from normal install to command line system install, then you can proceed with the installation. It's pretty straight forward and easy.

For partitioning, I suggest selecting manual option would be better. If you're not sure what to do, probably you can use other tools before the installation such as System Recovery CD or GParted liveCD to set your partitions. By doing so, you just need to set mounting point during the installation. Since the ram size is small for the pc, it'll be better to set your swap partition 3 or 4 times bigger than the size of your ram. Once the installation done, you need to restart the pc.

Once you logged in, you can see a black screen with a white text. Don't worry, you're not going to spend the rest of your life with that black screen :). Here's what you need to do next

a) Update the system metadata
$ sudo aptitude update
b) Update the system
$ sudo aptitude upgrade
c) Install window manager, since the FVWM-Crystal version in Ubuntu repo is 3.0.4, you can upgrade to latest version (3.0.6 at the time of writing) by downloading the tarballs and install
$ sudo aptitude install xorg fvwm-crystal linux-headers-`uname -r` build-essential msttcorefonts tango-icon-theme menu
    $ wget http://download.gna.org/fvwm-crystal/3.0.6/fvwm-crystal-3.0.6.tar.gz
    $ tar -xvzf fvwm-crystal-3.0.6-tar.gz
    $ cd fvwm-crystal-3.0.6
    $ sudo make install
d) Make sure X knows to trigger FVWM-Crystal when it starts up
$ nano -w ~/.xinitrc
e) Type the text below to the file and press Ctrl+O and Ctrl+X to save and exit
$ exec fvwm-crystal
f) Start your window manager
$ startx
g) Once you're in, right click the desktop and X terminal will appear. Now we need to install some of the basic tools to the system. There's a lot of choices for file manager, my favorite are pcmanfm, thunar or nautilus
$ sudo aptitude install gdm xfce4-terminal nautilus synaptic update-manager ubuntu-gdm-themes usplash usplash-theme-ubuntu gnome-media file-roller
h) Then install other applications
$ sudo apt-get install firefox pidgin gedit abiword gnumeric rar unrar lha firestarter frozen-bubble gimp inkscape exaile vlc totem kaffeine
i) And the most important part is multimedia codecs
$ sudo apt-get install gstreamer0.10-plugins-ugly-multiverse gstreamer0.10-plugins-bad-multiverse gstreamer0.10-plugins-bad gstreamer0.10-plugins-ugly gstreamer0.10-ffmpeg libxine1-ffmpeg libdvdread3 w32codecs flashplugin-nonfree
There you are, a stripped down version of Ubuntu with lite windows manager :)

FVWM-Crystal default look


GDM


GDM Sessions


Recipes


Nebulae


Note:
Tested on Ubuntu 8.04 32-bit.

Tuesday, September 29, 2009

Installing latest NVidia display driver on Ubuntu (manual)...

1) Install Linux headers and build essential
    $ sudo apt-get install linux-headers-`uname -r` build-essential
2) Go to console mode by pressing Ctrl+Alt+F1

3) Logon

4) Stop X-Server
    $ sudo /etc/init.d/gdm stop
5) Execute the installer
    $ sudo sh NVIDIA-Linux-x86-[version].run
6) Complete the installation process

7) Execute command below
    $ sudo nvidia-xconfig --add-argb-glx-visuals
8) Restart X-Server
    $ sudo /etc/init.d/gdm start

Sunday, September 27, 2009

Installing Quake 3 Arena Demo on Ubuntu...

1) Download the installer from Id Software
    $ wget ftp://ftp.idsoftware.com/idstuff/quake3/linux/linuxq3ademo-1.11-6.x86.gz.sh
2) Allow the file to be executed as a program
    $ sudo chmod 755 linuxq3ademo-1.11-6.x86.gz.sh
3) Post Dapper, dash is a default shell for Ubuntu. We need to change this to bash before installing the game. To do so, open terminal and at home folder execute the following command and select <No>.
    $ sudo dpkg-reconfigure dash
4) Execute the installer
    $ ./linuxq3ademo-1.11-6.x86.gz.sh -target ~/programs/q3-temp
5) If the installer is returning an error like below
    Warning: unknown mime-type for "archive" -- using "application/*"
    Warning: unknown mime-type for "integrity..." -- using "application/*"
    Error: no such file "-r"
    Error: no such file "-n"
    Error: no such file "Verifying"
    Error: no such file "archive"
    Error: no such file "integrity..."
    tail: cannot open `+6' for reading: No such file or directory
    Warning: unknown mime-type for "-r" -- using "application/*"
    Warning: unknown mime-type for "Error" -- using "application/*"
    Warning: unknown mime-type for "in" -- using "application/*"
    Warning: unknown mime-type for "check" -- using "application/*"
    Warning: unknown mime-type for "sums" -- using "application/*"
    Warning: unknown mime-type for "1808389199" -- using "application/*"
    Warning: unknown mime-type for "1300192087" -- using "application/*"
    Error: no such file "-r"
    Error: no such file "Error"
    Error: no such file "in"
    Error: no such file "check"
    Error: no such file "sums"
    Error: no such file "1808389199"
    Error: no such file "1300192087"
    Press Return to close this window ...
6) Simply execute the command below and re-executing the installer
    $ export _POSIX2_VERSION=199209
7) During the installation, if there's a permission denied error on the targeted bin folder, simply create the folder manually using terminal or nautilus and proceed with the installation
    /
        /home
            /your-username
                /programs
                    /q3-demo
                        /bin
8) Launch the game
    $ programs/q3-demo/q3demo.x86
9) If there's no sound, check sound initialization section from the output, if it's the same as below
    ------- sound initialization -------
    /dev/dsp: Broken pipe
    Could not toggle.
10) Edit bootmisc.sh
    $ sudo gedit /etc/init.d/bootmisc.sh
From
    ...
    case "$1" in
    start|"")
    do_start
    ;;
    ...
to
    ...
    case "$1" in
    start|"")
    do_start
    echo "q3demo.x86 0 0 direct" > /proc/asound/card0/pcm0p/oss
    echo "q3demo.x86 0 0 disable" > /proc/asound/card0/pcm0c/oss
    ;;
    ...
11) Restart your machine (there should be a way to restart the service alone)

12) Launch the game with parameters shown below
    $ programs/q3-demo/q3demo.x86 +set s_musicvolume -1
13) Remove installer temp folder
    $ rm -r programs/q3-temp
14) Change back shell from bash to dash by selecting <Yes>
    $ sudo dpkg-reconfigure dash 
Note:
Installation steps tested on Ubuntu 9.04, 9.10, 10.04 and Linux Mint 7

Update (04/12/2009):
/etc/init.d/bootmisc.sh has been removed from Ubuntu 9.10.

Solution:
Add echo "q3demo.x86 0 0 direct" > /proc/asound/card0/pcm0p/oss into your game launcher script.
    #!/bin/sh
    # Needed to make symlinks/shortcurts work.
    # Run Quake III with some default arguments

    cd "/home/your-username/programs/q3-demo"
    sudo echo "q3demo.x86 0 0 direct" > /proc/asound/card0/pcm0p/oss
    quake="./q3demo.x86"
    "$quake" $*
    exit $?
Update (03/06/2010)
To install on Ubuntu 64 bit, need to add linux32 to the command
    $ linux32 ./linuxq3ademo-1.11-6.x86.gz.sh -target ~/programs/q3-temp
Tested on Ubuntu 10.04 Lucid Lynx 64 bit.

Update (27/08/2010)
If suddenly the sound gone and you couldn't get it back, open terminal and test this command:
    $ sudo echo "q3demo.x86_64 0 0 direct" > /proc/asound/card0/pcm0p/oss
If you're getting this error
    bash: /proc/asound/card0/pcm0p/oss: Permission denied
Just set the correct permission to the file and you're done. Tested on Ubuntu 10.04 Lucid Lynx 64 bit.

Update (18/11/2010)
Installation steps working correctly on Linux Mint 10. However I'm having difficulty executing the binary. Getting error "bash: ./q3demo.x86_64: No such file or directory". Still trying to figure out what went wrong.

Update (19/11/2010)
I almost forgot. Quake 3 Arena demo is a 32 bit application. Since I'm using Linux Mint 64 bit, I need to install 32 bit library to make it work. The library was pre-installed on Ubuntu 64 bit, but that's not the case for Linux Mint. Above issue solved!!!
    $ sudo apt-get install ia32-libs
Now there's one more issue left. The sound. /proc/asound/card0/pcm0p/oss file seems missing.

Update (20/11/2010)
Just found out that the ubuntu developers decided the majority of people don’t need OSS support, so they compiled the kernel without it.

Quake 3 without sound in Ubuntu 10.10
Ubuntu 10.10 no /dev/dsp

Damn!!!

Playing Id Software classic games on Ubuntu using ZDoom...

ZDoom is, essentially, an advanced source port for Doom. However, it doesn't just support Doom/Doom II... it also has support for Hexen, Heretic, and Strife.

1) Installing dependencies.
$ sudo apt-get install g++ zlib1g-dev libsdl1.2-dev libjpeg62-dev nasm tar bzip2 libgtk2.0-dev cmake build-essential
2) Get ZDoom sources from ZDoom Downloads Page or Subversion Repository (recommended).

3) If you want to use the sources from Subversion, execute the command below
$ sudo apt-get install subversion
4) Create programs folder in your home directory (optional. this is for newbies only)
$ mkdir programs
cd programs
5) To obtain the latest version from the SVN, use the following command
$ svn checkout http://mancubus.net/svn/hosted/zdoom/zdoom/trunk
6) Download FMod package and save it in programs folder created earlier or you can execute the following command.
$ wget http://www.fmod.org/index.php/release/version/fmodapi42608linux.tar.gz
7) Unzip FMod package by using right click and extract here or the following command
$ tar -xvzf fmodapi42608linux.tar.gz
8) Now you will have a folder with a structure like shown below
    /
        /home
            /your-username
                /programs
                    /fmodapi42608linux
                    /trunk
9) Rename folder fmodapi42608linux to fmod-4.26.08

10) Rename folder trunk to zdoom

11) Using terminal (at this point you are still inside programs folder), go to zdoom folder
$ cd zdoom
12) Invoke CMake to parse the ZDoom source and get ready for compiling
$ cmake -DFMOD_INCLUDE_DIR=~/programs/fmod-4.26.08/api/inc -DFMOD_LIBRARY=~/programs/fmod-4.26.08/api/lib/libfmodex-4.26.08.so
13) Compile the code
$ make
14) If all goes well, an executable zdoom and the zdoom.pk3 file will be generated in the directory. To start zdoom, use the following command
$ ./zdoom
15) ZDoom will try to search for the IWAD files from $HOME/.zdoom or /usr/local/share. If you have an IWAD files in a different location, simply edit zdoom.ini located in ~/.zdoom by adding the path in [IWADSearch.Directories] section
# These are the directories to automatically search for IWADs.
    # Each directory should be on a separate line, preceded by Path=
    [IWADSearch.Directories]
    Path=.
    Path=$DOOMWADDIR
    Path=~/.zdoom
    Path=~/programs/id-classic-wads/
    Path=/usr/local/share/
Note:
Installation steps tested on Ubuntu 9.04 and Linux Mint 7
ZDoom SVN revision: 1880
FMod version: 4.26.08

Friday, September 25, 2009

Bridge option (VirtualBox)...

An old post from my lost blog.

Finally...it's working


Finally...I'm able to use network bridge option for my vm under VirtualBox (after a lot of trial and error). Actually there's a bug in VirtualBox that will caused FireStarter (an interface for iptable) to stop working if I use bridging.

http://www.virtualbox.org/ticket/970

Fortunately, there's still a workaround even though it will be easy if I just remove FireStarter, but I really need it because without it, undoubtedly it's difficult for me to configure the firewall on my machine (I'm still at beginner level).

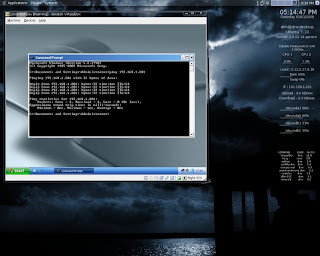
Guest ping Host OS


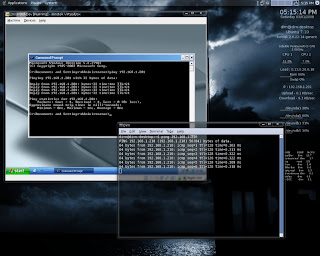
Host ping Guest OS


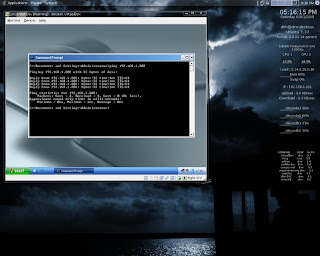
Guest ping another physical machine within the network


Steps need to be done on Host OS
1) Install the utilities
$ sudo apt-get install bridge-utils uml-utilities
2) Add your username as part of uml-net group
$ sudo gpasswd -a [your user name] uml-net
3) Open network interface
$ sudo gedit /etc/network/interfaces
4) Add the text below at the end of the line
auto tap0
    iface tap0 inet manual
    up ifconfig $IFACE 0.0.0.0 up
    down ifconfig $IFACE down
    tunctl_user [your user name]

    auto br0
    iface inet dhcp
    bridge_ports eth0 tap0
5) Restart network service
$ sudo /etc/init.d/networking restart
Note:
you can also use static ip instead of dhcp.

Virtual Machine Settings


Steps need to be done on virtual machine
1) Under Details tab go to Network option

2) Under Adapter 0 tab, enabled the network adapter and set the value
Attached to = Host Interface

3) Under Host Interface Settings set value
Interface Name = tap0

This should work fine if you're not using FireStarter. Otherwise below is an extra steps that need to be done. Before you proceed, let's do some checking.

1) Go to terminal and type
$ sudo iptables -nL
2) If the output is something as shown below. Then only we fix FireStarter.
Chain INPUT (policy ACCEPT)
    target prot opt source destination

    Chain FORWARD (policy ACCEPT)
    target prot opt source destination

    Chain OUTPUT (policy ACCEPT)
    target prot opt source destination

FireStarter


Steps need to be done to fix FireStarter
1) Edit FireStarter script
$ sudo gedit /etc/firestarter/firestarter.sh
2) Search for the text as shown below
if [ "$MASK" = "" -a "$1" != "stop" ]; then
        echo "External network device $IF is not ready. Aborting.."
        exit 2
    fi
3) Replace the text with the text below
#if [ "$MASK" = "" -a "$1" != "stop" ]; then
        # echo "External network device $IF is not ready. Aborting.."
        # exit 2
    #fi
4) Reboot your machine

5) Once your machine restarted, open FireStarter and go to Preferences

6) Under Firewall->Network Settings set your
Internet connected network device = eth0
Local network connected device = br0

7) Checked Enabled internet connection sharing

8) Click Accept button

FireStarter Settings