Friday, October 30, 2009

Windows 7 "endless reboot"...

So now we have new terms for Windows, dubbed as "endless reboot". It seems like it happen to Vista users attempting to upgrade to Windows 7. Also another issue known as "62% bug", which finds the Windows 7 installation stalling at 62% complete. Microsoft’s support forums are rapidly filling with users reporting both issues.

If my memory serve me correctly, including these two now we have
  • Blue screen of death
  • Green ribbon of death
  • Endless reboot
  • 62% bug

What's next?

To Linux user, don't be so happy. It still have "kernel panic" problem sometimes.

Moral of the story.
There's no such thing as "Perfect OS". From the software development point of view, there will always be a bugs. If someone said that it's perfect that means it's bullshit, marketing people tends to say this by sweeping the truth under the carpet...

Thursday, October 29, 2009

Fake Google Chrome OS...

People gets too excited to know how Google Chrome OS looks like thus giving an opportunity for someone to fake it :) If the fake creator targeted high traffic for his/her site, I guess he/she had successfully did it :)

Read it from here.

It's human nature to seek info into something that has been given a lot of coverage on it yet it is still not ready (Windows Longhorn anyone?)...

Wednesday, October 21, 2009

Rise of the laptop...

Screenshots...


Last year, an old friend of mine (Hazman) has given his old laptop (Compaq Presario V2000) for my kids (at first I thought he asked me to fixed it for him). The laptop is still in good condition but without battery and power adapter. I bought a brand new power adapter for RM 120.

Since the laptop only have 256Mb ram, I've installed XP Pro (pirated version) but once connected to internet I'm getting the BSOD complaining about NTOSKernel error. Installed Xubuntu, everything works fine except that when playing an online games the response was too slow. In the end both my kids use back my old machine.

Last weekend I managed to get a secondhand DDR1 PC2700 512Mb ram. Bought it from Meri for RM 65. On Sunday, I've given a new life to the laptop by installing Ubuntu 9.10 beta. The kids love it (not because of the OS and definitely they don't care about it, it's because they can play online games better now).

Talk about Ubuntu 9.10, I noticed there's new software included by default (apart from Empathy). Palimpsest Disk Utility, a nice utility that will notify you if your harddisk life going to end soon. It happen to this laptop :) I guess I need to prepare some money for the new harddisk...

Wednesday, October 14, 2009

MultiGet Download Manager...

Finally I've found a good download manager for Linux. All this while I'm using D4X and had thought that it's the only available download manager for Linux. Yes, I know wget, curl etc. I'm talking about something with GUI instead of command line. MultiGet does the job for me now. Great thing about MultiGet is that it can run on Windows 2000/XP, almost all Linux desktops, MacOs and BSDs.

Features
  • Multi-task/multi-thread/multi-server usage
  • User-friendly interface (resembling Flashget)
  • Multiple language support
  • Proxy support
  • Extension ignoring/capture
  • FTP anonymous pass
  • Panel icon

MultiGet is available in Ubuntu Universe repository. To install, open terminal and type
    $ sudo apt-get install multiget
For the list of download managers available for Linux, you can refer to this blog.

Tuesday, October 13, 2009

Easiest way renaming file extension (in bulk)...

From uppercase to lowercase or vice versa.

In Linux,
1) All files in a directory
    $ for f in *.JPG; do mv "$f" "${f%JPG}jpg"; done
2) Files within subdirectory(ies) included
    $ for f in `find -name "*.JPG" -type f`; do mv "$f" "${f%JPG}jpg"; done
To learn more, go to Command line reference: Database and Operating Systems.

Run Warsow and getting black screen with message...

"Display is not supported" or "Out of Range". This only happen to lcd monitor.
Solution:
1) Edit Warsow config file
    $ gedit ~/.warsow/basewsw/config.cfg
2) Search for "vid_customheight" and "vid_customwidth" and change the value to one of the resolution (higher than 800x600) that works with your monitor
    seta vid_customheight "768"
    seta vid_customwidth "1024"
Same problem happen to me with Extreme Tux Racer.
Solution:
1) Edit Extreme Tux Racer options file
    $ gedit ~/.etracer/options
2) Search for "y_resolution" and "x_resolution" and change the value to one of the resolution (higher than 800x600) that works with your monitor
    set x_resolution 1280
    set y_resolution 1024

Friday, October 9, 2009

Recovering GRUB after installing Windows...

1) Download Super Grub Disk

2) Burn the image to a blank cd and reboot your machine

3) Boot into your Linux (0.9598 and 0.9799 menu options are slightly different)

4) Once in, open terminal and type
    $ sudo fdisk -l
5) You will see an output like this. For this case /dev/sda4 is my /boot partition
    Device    Boot      Start         End      Blocks   Id  System
    /dev/sda1   *          66        5222    41423602+   7  HPFS/NTFS
    /dev/sda2            5223        6266     8385930   83  Linux
    /dev/sda3            6267       30401   193864387+   5  Extended
    /dev/sda4               1          65      522081   83  Linux
    /dev/sda5            6267        6527     2096451   82  Linux swap / Solaris
    /dev/sda6            6528        9138    20972826   83  Linux
    /dev/sda7            9139       24803   125829081   83  Linux
    /dev/sda8           24804       30401    44965903+  83  Linux

    Partition table entries are not in disk order
6) Mount the partition. Change xxx into your partition number (Since I've already boot into my Linux and /dev/sda4 is mounted to /boot, I'm not sure whether this step is still required)
    $ sudo mount /dev/xxx /mnt
7) Install GRUB to the MBR
    $ sudo grub-install --root-directory=/mnt hd0
If step #6 is not required, I'm assuming the command would be (I need to check this with Ady)
Update 2009/10/13: Step #6 is not required if you booted into your own Linux instead of LiveCD.
    $ sudo grub-install --root-directory=/ hd0
8) I didn't make any changes to my existing /boot/grub/menu.lst file

Note:
Steps tested on my wife's machine with Linux Mint 7 after I'm installing Windows Server 2008. SGD version 0.9598.

An easiest way from Ubuntu wiki
1) Download Super Grub Disk

2) Burn into a cdrom

3) Boot from it

4) Select: GRUB => MBR & !LINUX! (>2) MANUAL |8-)

5) Select the Linux or Grub installation you want to restore.

6) You'll see the message: SGD has done it!

7) Reboot

Note:
I haven't try the second option yet.

Thursday, October 8, 2009

Windows Server 2008...

check out the cpu usage


I've installed Windows Server 2008 as a guest OS on my machine. Expecting the installation time will take about 45 minutes to an hour. This time, I'm wrong. After 20 minutes, installation complete. Read a lot of news/blogs/forums, people claims that Window Server 2008 has a great improvement on performance. Haven't got a chance to play around with the OS yet but I'd love to use it at my office if available. That's my first impression.

Windows 7 is going to be release soon. Lots of good response from testers. Let's wait for the final product to come...

Sunday, October 4, 2009

Limiting user accounts that can connect remotely via SSH...

1) Installing SSH
    $ sudo apt-get install openssh-server
2) Backup current ssh server configuration file
    $ sudo cp /etc/ssh/sshd_config /etc/ssh/sshd_config.backup
3) Edit the configuration file
    $ sudo gedit /etc/ssh/sshd_config
4) Change the parameter to disallows the root user from connecting
    PermitRootLogin no
5) Add the parameter and specify the usernames (space separated) that can connect remotely.
    AllowUsers <user1> <user2> ...
6) To deny
    DenyUsers <user1> <User2> ...
7) If you enable the OpenSSH server and you do not wish to enable any remote connections, you may add
    AllowUsers nosuchuserhere
8) Restart the service
    $ sudo /etc/init.d/ssh restart

Saturday, October 3, 2009

HttpUtility.ParseQueryString save the day...

Imagine when coding, you're getting a querystring as a parameter in string format with something like "studentid=1024&stateid=12&zipcode=90210&editmode=false". To manipulate the zip code value how would you normally do?

Guess what, I'll blindly do a string manipulation to get or update the value. This is inefficient (on second thought, I feel like I'm stupid). I just noticed that there's an easy way available in .NET Framework that will make my life easier. It's available since .NET Framework 2.0!!! HttpUtility.ParseQueryString definitely save me from headache.

Sample code:
    private void SomeFunction()
{
const string queryString = "studentid=1024&stateid=12&zipcode=90210&editmode=false";

// Parses a query string into a NameValueCollection using UTF8 encoding.
var collection = HttpUtility.ParseQueryString(queryString);

// Original value
Console.WriteLine("original value in string format : ");
Console.WriteLine("{0}", collection);

// Get existing value
Console.WriteLine("existing value : {0}", collection.Get("zipcode"));

// Set new value
collection.Set("zipcode", "10001");

// Display the new value
Console.WriteLine("updated value : {0}", collection.Get("zipcode"));

// Convert back to string
Console.WriteLine("value in string format");
Console.WriteLine("{0}", collection);
}
Here's the output:
    original value in string format :
studentid=1024&stateid=12&zipcode=90210&editmode=false
existing value : 90210
updated value : 10001
value in string format
studentid=1024&stateid=12&zipcode=10001&editmode=false
Press any key to continue . . .

Friday, October 2, 2009

Finally, the winner is...Puppy Linux...

An old post from my lost blog.

Puppy Linux 4.0


I've been looking for a suitable distro to be install onto an old desktop/laptop. Started with DSL, Fluxbuntu, Xubuntu and UbuntuLite. Xubuntu is not suitable if you have ram less than 192Mb. As for DSL and Fluxbuntu, using Fluxbox as a window manager is sort of disadvantage for my targeted user. UbuntuLite doesn't come with a LiveCD for me to show a demo and multimedia codecs by default once I've installed it. It'll be troublesome in case if there's no internet connection available.

JWM window manager


Then Puppy Linux came to the picture. It came with JWM window manager, which is something similar to Windows (again, I'm talking about from end user perspective) and according to Wikipedia, it is possible to run Puppy Linux on a PC with only 48Mb of ram. I've tested it on my neighbour's old laptop (TwinHead Slimnote VX with 192Mb ram with Intel Pentium II 300Mhz) and it works flawlessly. The .ISO image is quite small which is about 87Mb. Don't underestimate something that comes with a smaller size. Once installed, everything works perfectly including multimedia codecs and web browser plugins.

SeaMonkey web browser


This is a perfect solution (at least for me), to promote Linux to my friends and family, especially those with an old machine and no internet connection available. DivX and mp3 files can be play out of the box. All I can say is...I'm very happy with the distro :D


Thursday, October 1, 2009

System.Net.NetworkInformation...

An old post from my lost blog.

My brother was asking for help on how to get the information from network interface so that it can be use to monitor the network activity. I did some googling and I've found this piece of code. Simple enough but can be very useful if we expand it further.
    private static void GetNetworkInfo()
    {
        NetworkInterface[] interfaces = NetworkInterface.GetAllNetworkInterfaces();

        if (NetworkInterface.GetIsNetworkAvailable())
        {
            foreach (NetworkInterface iface in interfaces)
            {
                if (iface.OperationalStatus == OperationalStatus.Up && iface.NetworkInterfaceType != NetworkInterfaceType.Loopback)
                {
                    IPv4InterfaceStatistics stats = iface.GetIPv4Statistics();

                    long newsentbytes = stats.BytesSent;
                    long newreceivedbytes = stats.BytesReceived;

                    long sentbytes = newsentbytes - (oldsentbytes == 0 ? newsentbytes : oldsentbytes);
                    long receivedbytes = newreceivedbytes - (oldreceivedbytes == 0 ? newreceivedbytes : oldreceivedbytes);

                    Console.WriteLine("Bytes sent: {0}", sentbytes.ToString());
                    Console.WriteLine("Bytes received: {0}", receivedbytes.ToString());

                    oldsentbytes = newsentbytes;
                    oldreceivedbytes = newreceivedbytes;
                }
            }
        }
    }

Wednesday, September 30, 2009

Ubuntu + FVWM-Crystal = Low Memory PC...

An old post from my lost blog.

Installation modes


Why must it be Ubuntu?
Because it's much more easier for me to find my favorite .deb in repository and internet (deluge, exaile etc). This is a case for pc with Pentium III or higher but lower in ram size (128Mb to be precise, and most of my relatives are using this kind of pc).

Why Pentium III or higher?
It is noted in polishlinux.org regarding Ubuntu system responsiveness

"Technically, packages (except for the kernel and libc) are compiled for 486, but with Pentium III (or higher) optimizations."

So for pc with the lower specification as I mentioned above, Puppy Linux will do the job :)

Ok, first thing needs to be done is to download the alternate installer .iso image from here or the torrent file from here. Burn it to a disc and boot your pc with it. At installation menu, press F4 to change installation mode from normal install to command line system install, then you can proceed with the installation. It's pretty straight forward and easy.

For partitioning, I suggest selecting manual option would be better. If you're not sure what to do, probably you can use other tools before the installation such as System Recovery CD or GParted liveCD to set your partitions. By doing so, you just need to set mounting point during the installation. Since the ram size is small for the pc, it'll be better to set your swap partition 3 or 4 times bigger than the size of your ram. Once the installation done, you need to restart the pc.

Once you logged in, you can see a black screen with a white text. Don't worry, you're not going to spend the rest of your life with that black screen :). Here's what you need to do next

a) Update the system metadata
$ sudo aptitude update
b) Update the system
$ sudo aptitude upgrade
c) Install window manager, since the FVWM-Crystal version in Ubuntu repo is 3.0.4, you can upgrade to latest version (3.0.6 at the time of writing) by downloading the tarballs and install
$ sudo aptitude install xorg fvwm-crystal linux-headers-`uname -r` build-essential msttcorefonts tango-icon-theme menu
    $ wget http://download.gna.org/fvwm-crystal/3.0.6/fvwm-crystal-3.0.6.tar.gz
    $ tar -xvzf fvwm-crystal-3.0.6-tar.gz
    $ cd fvwm-crystal-3.0.6
    $ sudo make install
d) Make sure X knows to trigger FVWM-Crystal when it starts up
$ nano -w ~/.xinitrc
e) Type the text below to the file and press Ctrl+O and Ctrl+X to save and exit
$ exec fvwm-crystal
f) Start your window manager
$ startx
g) Once you're in, right click the desktop and X terminal will appear. Now we need to install some of the basic tools to the system. There's a lot of choices for file manager, my favorite are pcmanfm, thunar or nautilus
$ sudo aptitude install gdm xfce4-terminal nautilus synaptic update-manager ubuntu-gdm-themes usplash usplash-theme-ubuntu gnome-media file-roller
h) Then install other applications
$ sudo apt-get install firefox pidgin gedit abiword gnumeric rar unrar lha firestarter frozen-bubble gimp inkscape exaile vlc totem kaffeine
i) And the most important part is multimedia codecs
$ sudo apt-get install gstreamer0.10-plugins-ugly-multiverse gstreamer0.10-plugins-bad-multiverse gstreamer0.10-plugins-bad gstreamer0.10-plugins-ugly gstreamer0.10-ffmpeg libxine1-ffmpeg libdvdread3 w32codecs flashplugin-nonfree
There you are, a stripped down version of Ubuntu with lite windows manager :)

FVWM-Crystal default look


GDM


GDM Sessions


Recipes


Nebulae


Note:
Tested on Ubuntu 8.04 32-bit.

Tuesday, September 29, 2009

Installing latest NVidia display driver on Ubuntu (manual)...

1) Install Linux headers and build essential
    $ sudo apt-get install linux-headers-`uname -r` build-essential
2) Go to console mode by pressing Ctrl+Alt+F1

3) Logon

4) Stop X-Server
    $ sudo /etc/init.d/gdm stop
5) Execute the installer
    $ sudo sh NVIDIA-Linux-x86-[version].run
6) Complete the installation process

7) Execute command below
    $ sudo nvidia-xconfig --add-argb-glx-visuals
8) Restart X-Server
    $ sudo /etc/init.d/gdm start

Sunday, September 27, 2009

Installing Quake 3 Arena Demo on Ubuntu...

1) Download the installer from Id Software
    $ wget ftp://ftp.idsoftware.com/idstuff/quake3/linux/linuxq3ademo-1.11-6.x86.gz.sh
2) Allow the file to be executed as a program
    $ sudo chmod 755 linuxq3ademo-1.11-6.x86.gz.sh
3) Post Dapper, dash is a default shell for Ubuntu. We need to change this to bash before installing the game. To do so, open terminal and at home folder execute the following command and select <No>.
    $ sudo dpkg-reconfigure dash
4) Execute the installer
    $ ./linuxq3ademo-1.11-6.x86.gz.sh -target ~/programs/q3-temp
5) If the installer is returning an error like below
    Warning: unknown mime-type for "archive" -- using "application/*"
    Warning: unknown mime-type for "integrity..." -- using "application/*"
    Error: no such file "-r"
    Error: no such file "-n"
    Error: no such file "Verifying"
    Error: no such file "archive"
    Error: no such file "integrity..."
    tail: cannot open `+6' for reading: No such file or directory
    Warning: unknown mime-type for "-r" -- using "application/*"
    Warning: unknown mime-type for "Error" -- using "application/*"
    Warning: unknown mime-type for "in" -- using "application/*"
    Warning: unknown mime-type for "check" -- using "application/*"
    Warning: unknown mime-type for "sums" -- using "application/*"
    Warning: unknown mime-type for "1808389199" -- using "application/*"
    Warning: unknown mime-type for "1300192087" -- using "application/*"
    Error: no such file "-r"
    Error: no such file "Error"
    Error: no such file "in"
    Error: no such file "check"
    Error: no such file "sums"
    Error: no such file "1808389199"
    Error: no such file "1300192087"
    Press Return to close this window ...
6) Simply execute the command below and re-executing the installer
    $ export _POSIX2_VERSION=199209
7) During the installation, if there's a permission denied error on the targeted bin folder, simply create the folder manually using terminal or nautilus and proceed with the installation
    /
        /home
            /your-username
                /programs
                    /q3-demo
                        /bin
8) Launch the game
    $ programs/q3-demo/q3demo.x86
9) If there's no sound, check sound initialization section from the output, if it's the same as below
    ------- sound initialization -------
    /dev/dsp: Broken pipe
    Could not toggle.
10) Edit bootmisc.sh
    $ sudo gedit /etc/init.d/bootmisc.sh
From
    ...
    case "$1" in
    start|"")
    do_start
    ;;
    ...
to
    ...
    case "$1" in
    start|"")
    do_start
    echo "q3demo.x86 0 0 direct" > /proc/asound/card0/pcm0p/oss
    echo "q3demo.x86 0 0 disable" > /proc/asound/card0/pcm0c/oss
    ;;
    ...
11) Restart your machine (there should be a way to restart the service alone)

12) Launch the game with parameters shown below
    $ programs/q3-demo/q3demo.x86 +set s_musicvolume -1
13) Remove installer temp folder
    $ rm -r programs/q3-temp
14) Change back shell from bash to dash by selecting <Yes>
    $ sudo dpkg-reconfigure dash 
Note:
Installation steps tested on Ubuntu 9.04, 9.10, 10.04 and Linux Mint 7

Update (04/12/2009):
/etc/init.d/bootmisc.sh has been removed from Ubuntu 9.10.

Solution:
Add echo "q3demo.x86 0 0 direct" > /proc/asound/card0/pcm0p/oss into your game launcher script.
    #!/bin/sh
    # Needed to make symlinks/shortcurts work.
    # Run Quake III with some default arguments

    cd "/home/your-username/programs/q3-demo"
    sudo echo "q3demo.x86 0 0 direct" > /proc/asound/card0/pcm0p/oss
    quake="./q3demo.x86"
    "$quake" $*
    exit $?
Update (03/06/2010)
To install on Ubuntu 64 bit, need to add linux32 to the command
    $ linux32 ./linuxq3ademo-1.11-6.x86.gz.sh -target ~/programs/q3-temp
Tested on Ubuntu 10.04 Lucid Lynx 64 bit.

Update (27/08/2010)
If suddenly the sound gone and you couldn't get it back, open terminal and test this command:
    $ sudo echo "q3demo.x86_64 0 0 direct" > /proc/asound/card0/pcm0p/oss
If you're getting this error
    bash: /proc/asound/card0/pcm0p/oss: Permission denied
Just set the correct permission to the file and you're done. Tested on Ubuntu 10.04 Lucid Lynx 64 bit.

Update (18/11/2010)
Installation steps working correctly on Linux Mint 10. However I'm having difficulty executing the binary. Getting error "bash: ./q3demo.x86_64: No such file or directory". Still trying to figure out what went wrong.

Update (19/11/2010)
I almost forgot. Quake 3 Arena demo is a 32 bit application. Since I'm using Linux Mint 64 bit, I need to install 32 bit library to make it work. The library was pre-installed on Ubuntu 64 bit, but that's not the case for Linux Mint. Above issue solved!!!
    $ sudo apt-get install ia32-libs
Now there's one more issue left. The sound. /proc/asound/card0/pcm0p/oss file seems missing.

Update (20/11/2010)
Just found out that the ubuntu developers decided the majority of people don’t need OSS support, so they compiled the kernel without it.

Quake 3 without sound in Ubuntu 10.10
Ubuntu 10.10 no /dev/dsp

Damn!!!

Playing Id Software classic games on Ubuntu using ZDoom...

ZDoom is, essentially, an advanced source port for Doom. However, it doesn't just support Doom/Doom II... it also has support for Hexen, Heretic, and Strife.

1) Installing dependencies.
$ sudo apt-get install g++ zlib1g-dev libsdl1.2-dev libjpeg62-dev nasm tar bzip2 libgtk2.0-dev cmake build-essential
2) Get ZDoom sources from ZDoom Downloads Page or Subversion Repository (recommended).

3) If you want to use the sources from Subversion, execute the command below
$ sudo apt-get install subversion
4) Create programs folder in your home directory (optional. this is for newbies only)
$ mkdir programs
cd programs
5) To obtain the latest version from the SVN, use the following command
$ svn checkout http://mancubus.net/svn/hosted/zdoom/zdoom/trunk
6) Download FMod package and save it in programs folder created earlier or you can execute the following command.
$ wget http://www.fmod.org/index.php/release/version/fmodapi42608linux.tar.gz
7) Unzip FMod package by using right click and extract here or the following command
$ tar -xvzf fmodapi42608linux.tar.gz
8) Now you will have a folder with a structure like shown below
    /
        /home
            /your-username
                /programs
                    /fmodapi42608linux
                    /trunk
9) Rename folder fmodapi42608linux to fmod-4.26.08

10) Rename folder trunk to zdoom

11) Using terminal (at this point you are still inside programs folder), go to zdoom folder
$ cd zdoom
12) Invoke CMake to parse the ZDoom source and get ready for compiling
$ cmake -DFMOD_INCLUDE_DIR=~/programs/fmod-4.26.08/api/inc -DFMOD_LIBRARY=~/programs/fmod-4.26.08/api/lib/libfmodex-4.26.08.so
13) Compile the code
$ make
14) If all goes well, an executable zdoom and the zdoom.pk3 file will be generated in the directory. To start zdoom, use the following command
$ ./zdoom
15) ZDoom will try to search for the IWAD files from $HOME/.zdoom or /usr/local/share. If you have an IWAD files in a different location, simply edit zdoom.ini located in ~/.zdoom by adding the path in [IWADSearch.Directories] section
# These are the directories to automatically search for IWADs.
    # Each directory should be on a separate line, preceded by Path=
    [IWADSearch.Directories]
    Path=.
    Path=$DOOMWADDIR
    Path=~/.zdoom
    Path=~/programs/id-classic-wads/
    Path=/usr/local/share/
Note:
Installation steps tested on Ubuntu 9.04 and Linux Mint 7
ZDoom SVN revision: 1880
FMod version: 4.26.08

Friday, September 25, 2009

Bridge option (VirtualBox)...

An old post from my lost blog.

Finally...it's working


Finally...I'm able to use network bridge option for my vm under VirtualBox (after a lot of trial and error). Actually there's a bug in VirtualBox that will caused FireStarter (an interface for iptable) to stop working if I use bridging.

http://www.virtualbox.org/ticket/970

Fortunately, there's still a workaround even though it will be easy if I just remove FireStarter, but I really need it because without it, undoubtedly it's difficult for me to configure the firewall on my machine (I'm still at beginner level).

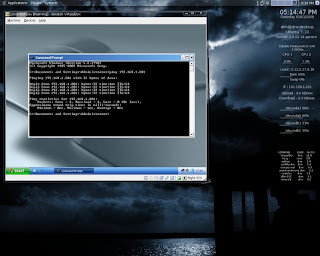
Guest ping Host OS


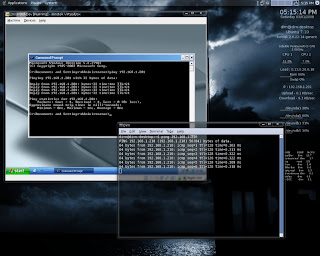
Host ping Guest OS


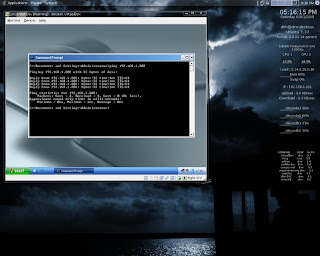
Guest ping another physical machine within the network


Steps need to be done on Host OS
1) Install the utilities
$ sudo apt-get install bridge-utils uml-utilities
2) Add your username as part of uml-net group
$ sudo gpasswd -a [your user name] uml-net
3) Open network interface
$ sudo gedit /etc/network/interfaces
4) Add the text below at the end of the line
auto tap0
    iface tap0 inet manual
    up ifconfig $IFACE 0.0.0.0 up
    down ifconfig $IFACE down
    tunctl_user [your user name]

    auto br0
    iface inet dhcp
    bridge_ports eth0 tap0
5) Restart network service
$ sudo /etc/init.d/networking restart
Note:
you can also use static ip instead of dhcp.

Virtual Machine Settings


Steps need to be done on virtual machine
1) Under Details tab go to Network option

2) Under Adapter 0 tab, enabled the network adapter and set the value
Attached to = Host Interface

3) Under Host Interface Settings set value
Interface Name = tap0

This should work fine if you're not using FireStarter. Otherwise below is an extra steps that need to be done. Before you proceed, let's do some checking.

1) Go to terminal and type
$ sudo iptables -nL
2) If the output is something as shown below. Then only we fix FireStarter.
Chain INPUT (policy ACCEPT)
    target prot opt source destination

    Chain FORWARD (policy ACCEPT)
    target prot opt source destination

    Chain OUTPUT (policy ACCEPT)
    target prot opt source destination

FireStarter


Steps need to be done to fix FireStarter
1) Edit FireStarter script
$ sudo gedit /etc/firestarter/firestarter.sh
2) Search for the text as shown below
if [ "$MASK" = "" -a "$1" != "stop" ]; then
        echo "External network device $IF is not ready. Aborting.."
        exit 2
    fi
3) Replace the text with the text below
#if [ "$MASK" = "" -a "$1" != "stop" ]; then
        # echo "External network device $IF is not ready. Aborting.."
        # exit 2
    #fi
4) Reboot your machine

5) Once your machine restarted, open FireStarter and go to Preferences

6) Under Firewall->Network Settings set your
Internet connected network device = eth0
Local network connected device = br0

7) Checked Enabled internet connection sharing

8) Click Accept button

FireStarter Settings