Friday, October 21, 2011

Ubuntu 11.10 basic GNOME Shell tweaks...

1) Install GNOME Shell and gnome-tweak-tool, then restart your machine and choose GNOME for your session
$ sudo apt-get install gnome-shell gnome-tweak-tool
2) Install Cantarell font
  • Download font from here
  • Copy font into /usr/share/fonts folder
  • Run command below:
$ sudo fc-cache -f -v
3) Gnome-tweak-tool settings
  • Desktop - turn off everything
  • Fonts:
    • Default font - Cantarell
    • Window title font - Cantarell Bold
  • Shell - Arrangement of buttons on the titlebar - All
  • GTK+ theme - Adwaita (default)

4) Remove overlay scrollbars
$ sudo apt-get remove overlay-scrollbar liboverlay-scrollbar3-0.2-0 liboverlay-scrollbar-0.2-0
5) Fix Alt+F2
  • Go to System Settings -> Keyboard -> Shortcuts -> System, remapping Alt+F2 to Show the run command prompt.

6) Disable Global Menu
$ sudo apt-get remove appmenu-gtk3 appmenu-gtk appmenu-qt
7) Change LightDM background via LightDM Manager
  • Download LightDM Manager from here.
  • Install dependencies (not sure why we need to do this manually on 11.10)
  • Install LightDM Manager
    $ sudo apt-get install python-launchpad-integration gtk2-engines-pixbuf
    $ sudo dpkg -i simple-lightdm-manager_0.2-public7_all.deb
8) Fix on Conky script to make it work with GNOME Shell (credit to sgaap)
    own_window_class Conky
    own_window yes
    own_window_type conky
    own_window_transparent yes
    own_window_hints undecorated,below,sticky,skip_taskbar,skip_pager

Thursday, October 20, 2011

Ubuntu sex command at man page...

LOL!!! nice joke of the day.

sex man page


oneiric (6) sex.6fun.gz
Provided by: funny-manpages_1.3-5_all

NAME
sex -- have sex

SYNOPSIS
sex [options] ... [username] ...

DESCRIPTION
sex allows the invoker to have sex with the user(s) specified in the
command line. If no users are specified, they are taken from the
LOVERS environment variable. Options to make things more interesting
are as follows:

-1 masturbate

-a external stimulus (aphrodisiac) option

-b buggery

-B animal
bestiality with animal

-c chocolate sauce option

-C chaining option (cuffs included) (see also -m -s -W)

-d file
get a date with the features described in file

-e exhibitionism (image sent to all machines on the net)

-f foreplay option

-F nasal sex with plants

-i coitus interruptus (messy!)

-j jacuzzi option (California sites only)

-l leather option

-m masochism (see -s)

and the list goes on...

Monday, October 3, 2011

GNOME Shell, it's not as bad as it seems to be...

There's so much discussions going on regarding GNOME Shell and Unity. People talked as if the world is going to end soon (okay, I'm a little bit exaggerate here :)). I had this kind of impression after read too much negative posts / comments related to the DEs. Agreed on Unity, after tested it for sometimes, I got to admit that I myself hate it as well.

But GNOME Shell, is a different story, after play it for a while (OpenSuse LiveCD) I found out that it's quite nice. Things like "super key + type app name + enter" and dynamic desktop switcher (predefined number of desktops are not required) was kinda cool. It might feel odd at the beginning when my working and activities (I believe that's how they defined it) mode are separated into two (no launchers or list of applications visible on your desktop unless if you're in the activities mode). But after sometimes, I got used to it. It'll be great if I can interact with objects using keyboard in "Activities" mode. As of now (at the time of writing this post), things like opening apps or selecting existing windows can only be done via mouse clicking.

Of course I still love my current desktop with GNOME 2 (Shell is the core user interface of the GNOME desktop environment starting with version 3). It'll be great if I can customize GNOME Shell to look like my current desktop. It is possible to customize GNOME Shell (via gnome-tweak-tool) but only to certain extend. Things that I'll miss a lot from GNOME 2 are effects from Compiz (since GNOME shell is using Mutter for window compositing and won't work with Compiz), especially desktop cube. It's kind of an unofficial trademark that when others saw the desktop with cube, they knew it's Linux (or at least the idea is from Linux when they saw it on Windows).

I hate the idea of sharing the same interface into multiple devices as well. That seems to be the direction taken by tech companies (MS included) nowadays. Luckily for Linux users, we can change our DE to our liking (or at least the best to our liking). That's the beauty of it, and that's one of the main reason I've learned basic Linux (apart from freeing myself from virus, malware, crapware etc). Yes, I know there's no such thing as secure OS, but at least my mind is at peace when using it.

Tuesday, September 27, 2011

Things to do after upgraded to Katya 64-bit...

Yes, I know it's a late upgrade and the new release is coming soon. But, who cares. I just got a chance to do it last night.

1) Enabling Compiz will cause windows movement lagging
Solution:
  • At CCSM, go to "Composite -> General -> Refresh Rate" and change the value to 60
  • Then go to "OpenGL -> General", unchecked "Sync To VBlank" option

2) Enabling Blur effect, adding "class=Gnome-terminal" will cause windows flicker.
Solution:
  • Use type "Normal" instead
	type=Menu | PopupMenu | DropdownMenu | Tooltip | Notification | Combo | Dnd | Normal

3) Overlay scroll started to annoy me
Solution:
  • Uninstall the library
	$ sudo apt-get --purge remove overlay-scrollbar liboverlay-scrollbar-0.1-0

4) My Quake 3 demo is not working
Solution:
  • Install ia32-libs library
	$ sudo apt-get install ia32-libs

5) No sound from my headphone jack?
Solution:

Thursday, September 15, 2011

WebService - PI - WebService scenario...

Scenario overview:
  • Third party app sending request to PI webservice.
  • PI passing the request to third party webservice.
  • Third party webservice returning response to PI.
  • PI webservice returning response to third party app.

Steps at Enterprise Service Builder
1) Create request and response Data Type for SENDER.

2) Create request and response Message Type for SENDER.

3) Create External Definition and import wsdl file generated from external webservice. By doing so you should have the request and response External Message for RECEIVER.

4) Create outbound Service Interface.
  • Category: Outbound
  • Mode: Synchronous
  • For Request and Response Role, use Type as Message Type and assign Name with request and response message type respectively

5) Create inbound Service Interface.
  • Category: Inbound
  • Mode: Synchronous
  • For Request and Response Role, use Type as External Message and assign Name with request and response external message respectively

6) Create Message Mapping for request.
  • Source: Request Message Type
  • Target: Request External Message

7) Create Message Mapping for response.
  • Source: Response External Message
  • Target: Response Message Type

8) Create Operation Mapping.
  • Source Operation: Outbound Service Interface
  • Target Operation: Inbound Service Interface
  • Request Mapping Program: Request Message Mapping
  • Response Mapping Program: Response Message Mapping

Steps at Integration Builder
1) Create Configuration Scenario.

2) Create Business Component.

3) Add SENDER Communication Channel to Business Component.
  • Adapter Type: SOAP

4) Add RECEIVER Communication Channel to Business Component.
  • Adapter Type: SOAP
  • Target URL: Third party webservice URL
  • SOAP Action: Third party webservice SOAP Action

5) Create Receiver Determination.
  • Sender
    • Communication Component: Business Component
    • Interface: Outbound Service Interface
    • Namespace: namespace defined in ESB

6) Create Interface Determination.
  • Sender
    • Communication Component: Business Component
    • Interface: Outbound Service Interface
    • Namespace: namespace defined in ESB
  • Receiver
    • Communication Component: Business Component
    • Receiver Interfaces:
      • Operation Mapping: Operation Mapping defined in ESB (important)
      • Name: Inbound Service Interface
      • Namespace: namespace defined in ESB

7) Create Sender Agreement.
  • Sender
    • Communication Component: Business Component
    • Interface: Outbound Service Interface
    • Namespace: namespace defined in ESB
    • Sender Communication Channel: SENDER communication channel

8) Create Receiver Agreement.
  • Sender
    • Communication Component: Business Component
  • Receiver
    • Communication Component: Business Component
    • Interfaces: Inbound Service Interface
    • Namespace: namespace defined in ESB
    • Receiver Communication Channel: RECEIVER communication channel

Tuesday, September 13, 2011

Basic info for SAP PI - F2F...

1) Create software component at System Landscape Directory (SLD) and import it into Enterprise Service Repository (ESR).

2) Build sequence for Enterprise Service Builder (ESB)
  • Namespace
  • Datatype
  • Messagetype
  • Service Interface
  • Message Mapping
  • Operation Mapping

3) Build sequence for Integration Builder (IB)
  • Configuration Scenario
  • Business Component (or Business System)
  • Communication Channel
  • FCC configuration in Communication Channel
  • Receiver Determination
  • Interface Determination
  • Sender Agreement
  • Receiver Agreement

For file to file scenario that doesn't require any mapping where source and target files are expected to be the same:
  • Create Communication Channel for both sender and receiver Business System
  • Create Integrated Configuration

Important notes:
- SLDAPICUST
- SM59
- SLDCHECK

- SU01
- SXI_CACHE
- SXMB_IFR
- SXI_MONITOR
- SXMB_MONI

When creating datatype, make sure the structure is properly construct

    data-type-name // your datatype name
        record // represent data row
            detail // represent data structure
                field1
                field2
                field3

Ref link: Step by Step Guides - Connectivity

** This post is just for my own personal reference.

Friday, August 12, 2011

Record steps to reproduce a problem...

As the title above suggest, there's a free tool included on Windows 7 (Pro and above) that really useful for developers to troubleshoot problems on their product. The tool name is "Record steps to reproduce a problem", it's kind of obvious isn't it?

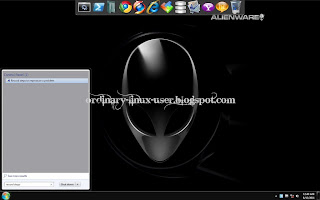
Search for the tool


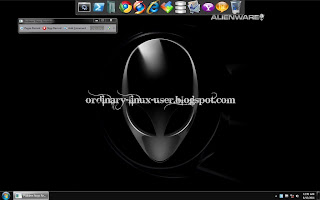
Start recording and do your stuff


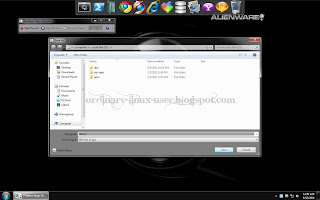
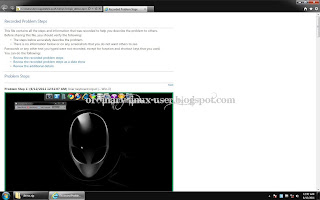
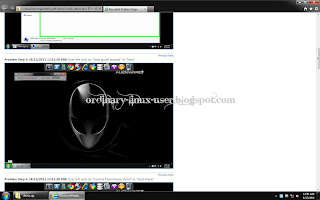
How to use it? Simple, click your Windows button and search for "record steps". You'll see the tool appear on menu and then click it. To start the session click "Start Record" button. Do your stuff and stop recording by clicking "Stop Record" button. A file dialog will appear for you to save the recorded session into a zip file. Unzip the file and you'll get the report in mhtml format.

Stop recording and save the session


This remind me the days when trouble shooting was my main activity while working at my previous company. Life would be easier if I had found this tool earlier.

Report header


Report details